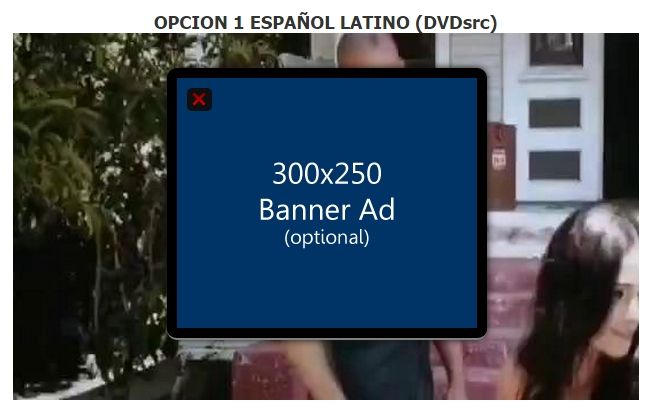
Hace poco creando un blog de vídeos y queriendo agregar publicidad en estos vídeos, he encontrado una forma muy fácil de insertar publicidad en estos vídeos antes de que estos se reproduzcan, ofreciendo al usuario la opción de cerrar el anuncio con el clásico botón «X».
Banner de publicidad encima de tus vídeos
Primero debes buscar la etiqueta y ]]></b:skin> debajo de ella agrega lo siguiente:
<b:if cond='data:blog.pageType == "item"'>
<style>
#bttcerrar{
background: #0F0F0F;
margin-top: 10px;
height: 20px;
border-radius: 5px;
width: 25px;
margin-left: 10px;
padding-top: 3px;
position: absolute;
}
#pubvids{
position: absolute;
padding: 10px;
left: 188px;
top: 35px;
width: 300px;
height: 250px;
background: #000;
text-align: center;
border-radius: 10px;
box-shadow: 0px 0px 10px #131313;
border-bottom: solid 2px #808080;
}
#pubvids2{
position: absolute;
padding: 10px;
left: 188px;
top: 35px;
width: 300px;
height: 250px;
background: #000;
text-align: center;
border-radius: 10px;
box-shadow: 0px 0px 10px #131313;
border-bottom: solid 2px #808080;
}
#pubvids3{
position: absolute;
padding: 10px;
left: 188px;
top: 35px;
width: 300px;
height: 250px;
background: #000;
text-align: center;
border-radius: 10px;
box-shadow: 0px 0px 10px #131313;
border-bottom: solid 2px #808080;
}
#pubvids4{
position: absolute;
padding: 10px;
left: 188px;
top: 35px;
width: 300px;
height: 250px;
background: #000;
text-align: center;
border-radius: 10px;
box-shadow: 0px 0px 10px #131313;
border-bottom: solid 2px #808080;
}
#pubvids5{
position: absolute;
padding: 10px;
left: 188px;
top: 35px;
width: 300px;
height: 250px;
background: #000;
text-align: center;
border-radius: 10px;
box-shadow: 0px 0px 10px #131313;
border-bottom: solid 2px #808080;
}
#pubvids6{
position: absolute;
padding: 10px;
left: 188px;
top: 35px;
width: 300px;
height: 250px;
background: #000;
text-align: center;
border-radius: 10px;
box-shadow: 0px 0px 10px #131313;
border-bottom: solid 2px #808080;
}
#pubvids6{
position: absolute;
padding: 10px;
left: 188px;
top: 35px;
width: 300px;
height: 250px;
background: #000;
text-align: center;
border-radius: 10px;
box-shadow: 0px 0px 10px #131313;
border-bottom: solid 2px #808080;
}
.oculto {display:none}
</style>
</b:if>
Ahora en la edición HTML de una entrada pega lo siguiente.
<br />
<br />
<div style="text-align: center;">
<b><span style="font-size: large;">OPCION #
</span></b></div>
<div style="position: relative;">
<div id="pubvids">
<div id="bttcerrar">
<a class="cerrar" href="javascript:void(0);" onclick="document.getElementById('pubvids').className = 'oculto'"><img src="http://i.imgur.com/V5bbSCu.png" /></a></div>
<div id="contenedor">
<div class="contenido">
//** CODIGO ANUNCIO 300X250**//
 </div>
</div>
</div>
<div>
<center>
//** CODIGO DE REPRODUCTOR DISEÑADO PARA 626x367**//
</center>
</div>
</div>
Reemplaza lo resaltado en color verde por lo que se indica en cada caso.
No olvides compartir esta entrada en tus redes sociales.


0 comentarios